Showing posts with label tips & tricks. Show all posts

Friday, September 8, 2017

Halloween Decorating Tricks For Less

**I was compensated for this post. This post also contains affiliate links and I will be compensated if you make a purchase after clicking on my links.  See my full disclosure for more details.**


Halloween is right around the corner, and it’s time to decorate!


Without ado, here are my top four Halloween decorating tips.


1. Color

The orange and black of the season makes me so happy; ya’ll know I bleed orange, right?  Go Pokes!

Halloween can be so black and white, but I love the pops of purple and orange, especially orange, to take things to another level. 

Halloween Decor Lanterns and Pumpkins
Get your adorable glittery pumpkin here!


2. Consistency

Bats, vampires, ghosts, witches, crows, skeletons, skulls, spiders, jack-lanterns, oh my!  I tend to stick with a limited number of themes around my house.  Personally, I’m not a vampire or ghost fan, but pumpkins are definitely my jam. 

I suggest that you stick with a theme or style around your home for Halloween decorating!

More glittery pumpkins!


3. Not too spooky

Many people love the guts and gore of Halloween, but please leave it at the store for decorating your home.  Halloween décor can classy and fun without grossing everyone out or scaring the children.  I love the cutesy décor that store like Hobby Lobby and Dollar Tree stock in droves. 

Stay classy with your Halloween decorating.  No need for blood and guts, friends.

Halloween Decor

This guy is the closest I've ever come to guts and gore, and honestly, I'm still on the fence about how much I like it.  


4. Height

And finally, my favorite and most importantly, height.  Huh, height?  The biggest challenge I’ve found is that all of my Halloween decorations are fairly close to the same height.  Honestly, it just makes any display look dull and boring. 

Check it out.

Halloween Decor Tricks


And here’s the final dining room display for Halloween!  You can see that varying the height of the pieces makes a huge difference in how attractive the display is.

And a bonus! 

Halloween decorating can get expensive quick (almost as fast as Christmas decorating), but…just say no!  I made this entire display for under $20. 

How?

I started with my own Halloween décor.  The lone witch’s shoe.  Add a trip to Dollar Tree and Goodwill, and we’re done. 

3 wall hangings @ $1/each from Dollar Tree (get your artsy skeleton here)
3 glittery LED-lit pumpkins @ $1/each from Dollar Tree (found here)
2 small lanterns @ $1/each from Dollar Tree 
2 pillar candles @ $1/each from Dollar Tree (found here)
1 witch’s hat @ $1/each from Dollar Tree
1 skull @ $1/each from Dollar Tree (found here)
1 BEWARE yard sign @ $1/each from Dollar Tree (found here)
1 shiney pumpkin @ $1/each from Dollar Tree (found here)
1 creepy cloth @ $1/each from Dollar Tree (found here)
1 candle holder @ $.50/each from Goodwill
3 orange ornaments that look suspiciiouly like pumpkins @ free from my Christmas décor
1 large black lantern @ free from my donate pile

= $15.50! 

My frugal soul loves to see that total!


And my time in Nebraska taught me that I should always have a decoration on my front door, so here we go!  I think these from Dollar Tree are super cute!  

Halloween Pumpkin Wooden Door DecorGlittery Pumpkin Halloween Door Decor Halloween Glittery Door Decor   

I’d love to hear about your decorating tips and “tricks” for Halloween!  Comment below.


Tuesday, April 22, 2014

Air Travel Tips for Pumping Moms: Part 3


Welcome back to Air Travel Tips for Pumping Moms!  This is Part 3 of a three part series on how to travel as a breastfeeding or pumping mom while traveling via flight.  Check out the Part 1 on going through security with your breast pump and breast milk and Part 2 on where and when to pump while flying.

There are so many gadgets and accessories that make life more convenient these days.  Here are my recommendations for gadgets that will make pumping while traveling easier and less of a hassle.

1. Battery Operated Breast Pump

If you often travel as a pumping mom, I would highly recommend investing in a battery operated breast pump.  Even if it's a relatively inexpensive one that you just use when you travel, it would be worth it to not need an outlet every time you pump.  This one from The First Years is just $72.

Travel Breast Pump


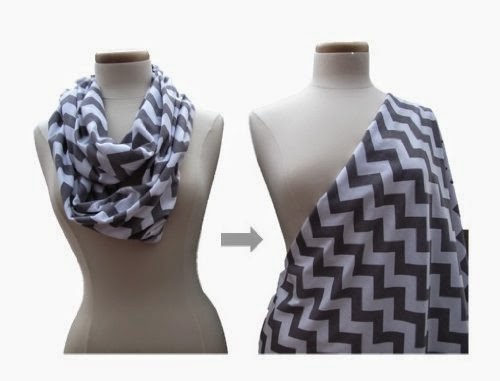
2. Nursing Covers

A blanket would work too, but I love these options for covering up while pumping.

Nursing Cover for Pumping while Traveling
Bizzy Bee: $42.49 at Amazon.com

Nursing Cover for Pumping while Traveling
Abbie Grace Infinity Nursing Scarf: $24.99 at Amazon.com

Nursing Cover for Pumping while Traveling
Find the directions for this DIY version here.


3. Freemie flanges


These flanges are compatible with most Medela pumps along with a few others, and they would be perfect for pumping on the airplane because they slip under your bra so that you can pump discretely.  You can find them on Amazon.com for $49.95.  They are a bit spendy if you ask me, but they are definitely on my wish list.  


4. Pumping bras

There are so many options out there for pumping bras, and I think this is must for when traveling.  You can go for the traditional pumping bra, a bustier version, and even a racerback version, but personally, I'm a fan of this pumping tank from Rumina Nursingwear.  Or a tutorial for a DIY pumping tank is available here. 

Rumina Nursingwear: $48.00 at Amazon.com

What other gadgets have made your life easier as a pumping mom?


Don't forget to check out the rest of this series on Air Travel Tips for Pumping Moms.


This post may contain affiliate links.

Wednesday, April 16, 2014

Air Travel Tips for Pumping Moms: Part 2


Air Travel Tips for Pumping Moms


Air Travel Tips for Pumping Moms

Part 2: Pumping while Traveling


This is Part 2 of three part series on travel tips for pumping moms.  Last week, I focused on carrying breast milk and your breast pump through security and onto the plane.  You can find Part 1 HERE.  

Part 2 of Air Travel Tips for Pumping Moms focuses on pumping while traveling, not just carrying the pump with you.  For me this was intimidating.  Where will I pump?  Will I be able to find an outlet in a bathroom stall?  Will I need to pump by the gate with just a blanket over me?  Will I have enough time to pump?  What if the only decent place to pump is far away from the gate?


1. Where to Pump

At the Airport

The first time I flew as a pumping mom, I planned to pump in the airport during the layovers (more about timing later).  But where would I pump?  After doing some online research, I found that pumping moms have to be incredibly flexible when it comes to air travel and pumping.

The obvious option is a women's restroom.  But I found that the outlets are near the sinks and mirrors, not near the stalls. That would mean pumping in front of a steady stream of traffic in and out of the restroom.  I was not a fan of this option unless I could find an outlet in a stall, and I never did.  But if push came to shove, I would have done it.

So where to next?  A family restroom.  Most airports of any size will have a few family bathrooms in each concourse or terminal.  I was able to find a close family restroom at all of the airports we flew through with the exception of the Omaha airport, which is just too small, I guess.

If a women's bathroom or family restroom aren't options for you, I also found the case of one mom who used an electrical outlet in a corner near her gate and simply draped a blanket over her for privacy.  Personally, I thought that mom was very brave.  Though I will admit that motherhood has drastically reduced my need for modesty, I don't think I could be comfortable pumping in a public area.  But again, sometimes as moms, we just do what we have to do.

In some places, there are exclusive areas for breastfeeding and pumping, though it is rare.  Check out these:

The Mamava nursing station at Burlington International in Vermont.  Check out the video here.

Mamava Nursing Pod
Source: Mamava
Mamava Nursing Station
Source: Williston Observer

And dedicated nursing rooms at Changi Airport in Singapore.  How cool is that!?

Nursing Rooms at Changi Airport Singapore
Source: Stuck at the Airport

On the Airplane

Did you know that you are allowed to pump breast milk while you are on the airplane?  No joke.  I had no idea that this was a thing.  It never even crossed my mind!

To present a fair case, however, I should tell you that there have been incidents where pumping moms were not allowed by a flight attendant to pump in-flight.  BUT, the airline issued an apology and stated that they do not have a policy that prohibits the use of breast pumps during flight (except during takeoff and landing since a pump is an electronic device).  You can read the whole story here.

Like taking your breast pump and breast milk through security, this is another case in which you may want to print out the airline's policies pertaining to pumping moms.

But, yes, you can pump in flight.  If you have a battery operated pump, you can simply pump in your seat or in the lavatory.  If you do not have a battery operated pump, I recently discovered that there are seats with outlets on some planes!  How great for pumping moms!  I would also recommend a window seat if you are planning to do this.  And while it may be awkward, I would also recommend informing the passenger seated next to you that you are pumping mom and will be pumping during the flight.  That way they aren't shocked with you pull out your pump.  And don't forget a blanket or poncho to cover up with!  In addition, there are also cases of flight attendants allowing moms pump in the flight attendant areas and offering to store breast milk in the on-board refrigerators.


2. When to Pump

The answer to this depends on where you plan to pump.

If you are planning to pump at the airport, the best suggestion I could give you is to book flights with a long(er) layover.  I know, we never ever want to have a long layover.  But remember the scene in Home Alone, where everyone is sprinting through the airport.

Home Alone Running through Airport
Source: Adventures as Mrs. Janney
You don't want to have to be sprinting to the family restroom only to not have time to pump before you need to sprint back to your gate.  So, longer layovers are better.  I would recommend about an hour and a half layover if possible or more.  That gives you some leeway in terms of delays with your first flight and so on.  Longer would be great too, but you definitely want to allot enough time to pump during your layover.

If you are planning to pump in flight, you'll need to make sure that there's enough flight time designated for "approved electronic devices" otherwise, plan to pump before you leave or during your layover.


To recap, if you are planning to pump at the airport:
  • Book flights with a layover of an hour and a half or more.
  • Look for a family restroom.
  • Ask an airport employee for recommendations of where to pump.
  • Use an outlet in a women's restroom.
  • Last, but not least, find a quiet corner near an outlet.  Cover up.  And pump away.

If you are planning to pump while on board the airplane:
  • Book a window seat with an outlet, if possible.
  • Inform the passengers next to you that you will be pumping.
  • Don't forget a blanket to drape over yourself.
  • Talk to the flight attendant if you need more privacy.


Come back next week for Part 3 of this series, Air Travel Tips for Pumping Moms, to find out about all of the gadgets that can help you navigate airports and airplanes as a pumping mom.  And don't forget to check out Part 1 - Carrying On Breast Milk and Your Breast Pump.

Check out the rest of this series on Travel Tips for Pumping Moms.


Wednesday, April 9, 2014

Air Travel Tips for Pumping Moms: Part 1


Air Travel Tips for Pumping Moms

As I mentioned in Baby President's 8-9 month update, we experienced our first time (x 4) traveling on a plane with an infant.  That also meant that my pump was coming along for the trip.  I wanted to be thoroughly prepared, so I did quite a lot of research online for travel info, TSA requirements, tips, tricks, everything!

This is the beginning of a 3 part series on air travel tips for pumping moms.

My research uncovered some shocking incidents and some comforting news as well.  I was a bit worried that I would be harassed by TSA agents after reading about a pumping mom who wasn't allowed to take her breast pump through security because the milk bottles were empty.  What?!?  So that she could take it with her, she was then forced to pump in a public restroom.  Not in a restroom stall, but by a counter were the only outlet was.

But honestly, I had absolutely no trouble with security.  None at all.  The TSA agents at both the Omaha airport and the Philadelphia airport were very polite and respectful.


Air Travel Tips for Pumping Moms

Part 1: Carrying Breast Milk on the Airplane


1. Breast Milk Storage


Breast milk is an exception to TSA's 3-1-1 rule.  In other words, you can take breastmilk on the plane in the normal 5 ounce pumping bottles OR your baby's bottle if baby is traveling with you.  I carried full pumping bottles, full baby bottles, and empty pumping bottles in the pump bag for convenience.

Check out the TSA's policy on breast milk HERE.  (Note: You can also carry-on formula in containers larger than 3 ounces.)


2. Breast Milk Screening 

At the security area, you will need to declare the breast milk to an agent.  The agent will ask you to remove any containers with breast milk.  You can either allow the milk to go through the x-ray machine like your shoes, laptop, and carry-on

OR

You can request an alternative screening that does not submit the milk to radiation.  I chose the alternative screening process, which was pretty painless, but took an extra minute or two.

One thing to note about the screening: the TSA agents can swab the outside of the full bottles and/or use a different machine (not an x-ray) to check the bottles, but they cannot, let me repeat, they cannot ask you to open the bottles filled with milk or open the bottles themselves.  


3. The Breast Pump

When you take the breast pump through security at the airport, you may be asked to remove it from a suitcase or other carry-on if needed.  (I removed it at one airport and left it in the carry-on suitcase at the other airport.)  It can be sent through the x-ray machine with the rest of your carry-on and personal items.  Breast milk is the only thing that I would be concerned with avoiding the x-ray machine; there's no need to expose the milk to the waves of radiation.  

In some online forums, moms suggested that a breast pump can be carried on as a medical device or medical equipment separate from other carry-on items.  This means that you could carry on your personal bag (purse), your carry-on (suitcase or duffle), AND a breast pump.  I could not find anything on the airlines' or TSA websites to confirm this, so you would want to contact your airline to confirm their policy.


4. One More Thing

I would highly recommend printing the TSA policy on breast milk and taking it with you, just in case.  I took printouts of the breast milk policy as well as all of the policies related to babies and children; I never had to reference them or show them to TSA agents, but I felt more comfortable knowing that I could produce them if necessary.


For more tips and a fantastic checklist for traveling with a breast pump, check out this article at Lactation Matters.