Friday, May 31, 2013

{Prepping for the Bean} Freezer Cooking #1: Ground Beef + Printables

Everyone, and I mean everyone, we have talked to has mentioned stalking up on freezer meals for the first month or so after the Bean arrives.  Since we do not have a chest freezer, and only have the freezer space in our side-by-side refrigerator, lots of pre-made, commercial frozen meals seemed like a rather inefficient idea.  Plus, since I'm super frugal and hate spending extra money on the decent frozen dinners, not to mention that they are usually unhealthy as well as mushy.  So, my first freezer cooking adventure began.

I found a local grocery deal on ground beef for $1.98/lb.  The catch was that to get the deal required a 10 lb purchase in one of those gross rolls.  I sucked it up and brought home my giant roll of ground beef.

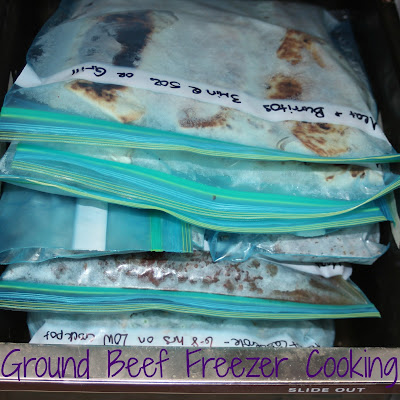
I started by browning all 10 pounds of ground beef, and from that 10 pounds, I made 3 pounds seasoned with onions, 4 pounds of taco meat, 2 pounds simply seasoned, with 1 pound leftover for spaghetti last night!  

The savings was great, especially compared to buying meals out of the freezer section at the grocery store!  Overall, I spent about $40 on the meat, produce, and a few other items, and was able to find everything else in my stockpile.  


9 lb Ground Beef Freezer Menu


You can find the printables for the grocery list and recipes here:


Preparing for Baby with Freezer Cooking

**Update**

Freezer Cooking Recipe Reviews

Tater Tot Casserole Review


Follow my blog with Bloglovin

Thursday, May 30, 2013

Introducing "Harvey Ever After"

If you've been following my blog, "Mommy (Wife & Grad Student)-in-Training", you will notice that it looks slightly different.  I decided the original name was too long, and created a new name, but the content you find will remain the same.  I am still trying to learn to be a wonder wife and marvelous mommy while still becoming a future prolific professor!

I'm happy to introduce my blog on my very own custom domain: 


You can still reach the blog at elisejanay.blogspot.com, but it will redirect to the new site!


Also, check out and like my new Facebook page for Harvey Ever After.


Productivity Focus: Weekly Goals

It seems to be a usual feeling that I need to learn better productivity skills when I'm writing this post each week.  Not only am I just behind in general, I'm also behind in just updating my goals!  I'm adding a few goals this week like making a daily to-do list based on the weekly goals that will hopefully help me achieve my weekly goals.  My motivation this week will definitely be the constant thought in the back of my mind that the baby could come any time now!  


What is your motivation?


Update on Goals for 5/22

Last weekend my husband was out of town picking up some new-to-us furniture, so I worked really hard to get a lot done around the house, though I'm afraid much of what I accomplished was not on my weekly goals list.  Nonetheless, I was at least somewhat productive!


Professor-in-Training

1.       Conduct 2 research interviews.
2.       Transcribe 2 completed interviews.
3.       Revise draft of major yearly paper. 
4.       Begin organizing for breath review paper.

Wonder Wife-in-Training

5.       Get back on track with my 31-Day Cleaning Routine
6.       Create a freezer meal plan for after the Bean arrives.
7.       Continue MSM's Clutter Busting Challenge.  While I did continue the challenge, I have been rather unsuccessful in the last few weeks.  Trying to finish strong in the next few days!  

Mommy-in-Training

8.      Pack the hospital bag (for me). - In progress
9.      Work on fabric farm animals to apply to nursery walls.
10.    Complete homemade cloth wipes; wash them. - On hold until I have a full load of baby stuff to wash

What is not on the list that I did complete was getting the Bean's clothes tucked away in his dresser, organizing the cloth diapers and rest of the changing table, setting up the baby swing, sliding a rocker into the nursery for nighttime feedings, along with finally completing the home organization center in our side entry nook.  


This Week's Goals 

Professor-in-Training

1.       Make progress on major yearly paper.
2.       Send revised draft to advisor.
3.       Continue organizing for breath review paper.   

Wonder Wife-in-Training

4.       Continue my 31-Day Cleaning Routine
5.       Make freezer meal plan for after the Bean arrives.
6.       Finish MSM's Clutter Busting Challenge.
7.       Make a daily to-do list based on these weekly goals.

Mommy-in-Training

8.      Finish packing the hospital bag (for me). 
9.      Complete one Bean prep project.
10.    Make sure guest room is ready for Bean's visitors.


How did your weekly goals go?  If you are participating in the 30-Day Clutter Busting Challenge, were you up to the challenge?  

Wednesday, May 29, 2013

{Project Reveal} Entry Nook Home Organization Center

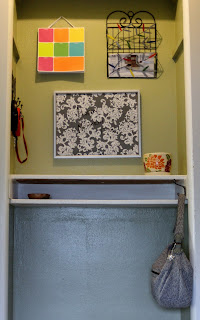
Ever since we moved into our house late last summer, I've wanted to do something fun with the entry nook.  This area is not to be confused with the foyer, instead this is a little nook that is the first thing we see when we enter the house from the side.  As time passed, I realized more and more that the area would make a perfect spot for a organization center for our home beyond having a place to toss the keys on the way in.


The components of our new home organization area are:

DIY Entry Nook1. Weekly calendar pad (like this one)

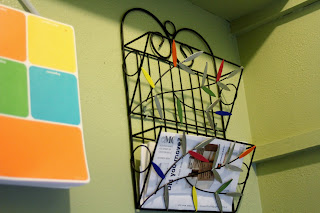
2. Mail organizer (like this one)

3. Dry erase message board 

4. Key holder

5. Leash hooks (like these)

6. Purse hook (like this one)


The only items I purchased specifically for the project were the calendar pad (on clearance at the university bookstore) and hook for my purse from Target.  I've never had a home for my purse before; I always walk in and set it on a chair, table, counter, or wherever.  Now the hook finally gives my purse a home where it is out of the way and where I will not have to search for it before leaving again. The hook might be my favorite part of the nook!

DIY Entry Nook

DIY Entry Nook


I repainted the leaves of the mail organizer from a copper to several bright colors and silver to match everything else.  The dry erase board is made from a repurposed old frame with fabric from Hobby Lobby instead of a photo.  I use a small planter pot for my key holder; it was originally purchased to be planter, but ended up making a great place to drop my keys, so I've used it that way ever since.

*This post may contain affiliate links.*

Monday, May 27, 2013

Pinterest in Practice: Chocolate Chip Cookie Pie

For Memorial Day weekend, the hubby and I went over to some friends for a little pre-Bean barbecue.  I offered to take dessert, and I was super excited about finding a new recipe to try.  It seems like I am always looking for main dish recipe ideas, but I just don't have the time (nor do any of us need the extra calories) for finding sweet recipe ideas for dessert.  

My two loves for recipe ideas are All Recipes.com and Pinterest.  Thanks to a recommendation from a friend AND a Pinterest recipe, I decided to try and test Chocolate Chip Cookie Pie from A Little Bit Crunchy!

Sounds delicious, right?!

The best part is that has less than 10 ingredients, and most of them I already had on hand (and you probably do, too).  I even had a pie crust in the freezer that I bought on a couponing run awhile back.  


Chocolate Chip Cookie Pie

The only negative was that it was already humid and warm outside, so having the oven on for an hour was uncomfortable, and I couldn't justify turning on the air conditioner yet.  


Chocolate Chip Cookie Pie

The result was well worth it!  The pie really does taste like a chocolate chip cookie with a slightly more moist texture.  I didn't serve it right out of the oven (which would most likely be awesome), but microwaving each piece for 15 seconds melted the chocolate again and really took it one step above amazing!  

The recipe is:

Chocolate Chip Cookie Pie


1 unbaked pie shell (I used a premade Pillsbury one)

2 large eggs

1/2 cup flour

small pinch salt
1/2 cup sugar
1/2 cup packed brown sugar
3/4 cup (1 1/2 sticks) unsalted butter, softened
1 1/4 cup semi-sweet chocolate chips


Preheat the oven to 325 degrees F.


Pie:

Beat the eggs, on high, until foamy.  Beat in the flour and then both sugars on medium or medium low.  Then, beat in the butter.  Stir in the chocolate chips.  Spoon into the pie crust and bake for 55-60 45 minutes.  Cool on a wire rack.


Topping:
Melt 1/4 cup chocolate chips.  Add 1/2 teaspoon oil.  Stir and pour into a piping bag zipper bag, and use a narrow tip.  Cut off a tiny corner and drizzle over the pie.


As you can see I made a few small changes.  I eliminated the nuts from the recipe altogether.  Also, thanks to my friend's suggestion I removed the pie after 45 minutes instead of 55 minutes.  Next time, I would probably even check it at 40 minutes because the crust was slightly darker than perfection.  If it had baked any longer than 45 minutes, it would have burnt.  The other big suggestion I would make is that if you have cake decorating supplies, a piping bag and narrow round tip would work much better than a ziploc baggie.  This time I was lazy and tried using a baggie.  While it did work, the drizzle would have looked much better and more consistent if I had used a piping bag instead.  Next I will make the effort to get out extra supplies.  If you don't have access to cake decorating supplies, I would suggest starting small when you cut the corner of the ziploc.  I thought I was cutting small, and the hole turned out bigger (i.e. the drizzle was thicker) than I would have preferred.


Chocolate Chip Cookie Pie


Overall Grade for this Pinterest in Practice Project: A-

The pie was delicious, but if I had followed the instructions perfectly, it would have burnt and likely been ruined for our Memorial Weekend BBQ.  


Mailbox Magic: Weekly Samples & Freebies

I always think it's like a holiday when I open my mailbox, and there's a package in there!  Freebies and samples are a usually a surprise because, honestly, I usually forget that I signed up for them.  But I only sign up for samples and freebies that I'm sure I will use, so I always know for sure that the packages contains something fun and functional!

This last week was a particularly great week of freebies in my opinion.  Here's the freebie grab from this week (remainder of the Similac package not shown, but there were also two formula samples).  


Thanks +P&G Brand Saver for the baby safety samples, Nature's Bounty for the smoothie shaker, Earthbound Organic for the reusable shopping bag, and Similac for the Simply Smart bottle, formula samples, and coupons!


Saturday, May 25, 2013

Graduation Celebration

Happy Graduation, Sister!

Last weekend, I had the privilege to travel (yes, even at 36 weeks prego) to Kansas to see my little sister graduate from college!  She is following in the family footsteps and heading to graduate school next fall at Oklahoma State!  Woot, woot!  Go Pokes!

Here are a few photos from our graduation photo shoot and family weekend.  

Congratulations, Sister!

Graduation Celebration

Graduation Celebration

Graduation Celebration

Graduation Celebration

Graduation Celebration

Graduation Celebration

Graduation Celebration

Graduation Celebration


Congratulations!

Friday, May 24, 2013

Pregnancy Update: 36 Weeks

How Mommy Feels:

Over the weekend, my feet and ankles started to swell even more than last week.  Before I could only tell when I tried to wear my Toms, but it became very noticeable.  I was incredibly self-conscious about it because I was at my sister's graduation party socializing with tons of people.  Honestly, I didn't know my feet could be so big.  Beyond the physical symptoms of clown feet, I'm feeling fantastic!  

How Daddy Feels:

Daddy is motivated.  He has been working hard to finish projects in the nursery and around the house before the Bean arrives.  After visiting friends last weekend with a one-month old baby girl, Daddy is even more excited and ready for the Bean.  He can't wait to try out all of his favorite baby and parenting techniques!   

What the Bean is Doing:

The Bean is still moving quite a bit.  My grandma kept asking me over the weekend if he had dropped yet (and asking me to stand up and turn round and round, so she could assess my belly).  I'm guessing he hasn't really dropped yet, but I can tell that he is still in the head down position.    

Nursery Update:

The dresser is fully painted, and we purchased new drawer pulls for it.  However, it turns out that no retail stores sell "dresser" pulls; they only sell cabinet drawer knobs, which are not the same size.  That meant that we were forced to fill in the old holes and drill new ones before the handles could be attached.  It's finally done though!  Photos coming soon for the big reveal!

Hospital Bag:

In progress.  The Bean's bag is packed!  I still haven't found a small, compact, travel case for wipes.  Even though I'm sure this product exists, apparently places like Target do not carry them.  My bag is partially packed, and I'm debating on some last items that I'm unsure if I'll want and need.  Daddy will be packing his bag soon, and then we will be ready(ish)!


36 Weeks


36 Weeks Pregnancy Update
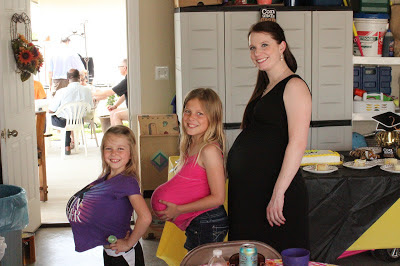
Me and my "pregnant" cousins

Wednesday, May 22, 2013

Productivity and Weekly Goals


Wow.  

I need to get better at life or at least become more productive.  Sometimes I think I should give up on weekly goals because I want to change them throughout the week as I finish things that weren't originally on the list, but could have been.  And if I could add them to the list, then I could cross them off of the list, right?!


Update on Goals for 5/13


Professor-in-Training
1.       Conduct 2 research interviews. 
2.       Transcribe 2 completed interviews.
3.       Revise draft of major yearly paper. 
4.       Begin organizing for breath review paper.

Wonder Wife-in-Training
5.       Get back on track with my 31-Day Cleaning Routine
6.       Take car into the shop for weird noise.  Done!  Car is fixed!
7.       Continue MSM's Clutter Busting Challenge; drop donations off.

Mommy-in-Training

8.      Organize nursery. - In progress.  Long story short - dresser handles and cabinet handles are not the same size.  
9.      Work on fabric farm animals to apply to nursery walls. In progress!
10.    Complete homemade cloth wipes; wash them.
11.    Get inoculated for pertussis.  

Since I was out of town most of the week, I guess I'll give myself a pass.  This week I don't have that luxury, and I definitely need to be more productive since the Bean could technically arrive anytime.


This Week's Goals 

Professor-in-Training
1.       Conduct 2 research interviews. 
2.       Transcribe 2 completed interviews.
3.       Revise draft of major yearly paper. 
4.       Begin organizing for breath review paper.

Wonder Wife-in-Training
5.       Get back on track with my 31-Day Cleaning Routine
6.       Create a freezer meal plan for after the Bean arrives.
7.       Continue MSM's Clutter Busting Challenge.

Mommy-in-Training

8.      Pack the hospital bag (for me). 
9.      Work on fabric farm animals to apply to nursery walls.
10.    Complete homemade cloth wipes; wash them.


How did your weekly goals go?  If you are participating in the 30-Day Clutter Busting Challenge, were you up to the challenge?  

{Prepping for the Bean} What's in the Baby's Hospital Bag?

The first bag I packed for the hospital was actually the bag for the Bean.  I probably should have packed the Mommy bag first, but honestly, it was more fun to pack for the baby!  As a first-time mother, I decided to acknowledge at the beginning that I was probably going to pack more than we needed, but that I would rather have options and not send my husband home for something (even though we live less than a mile from the hospital).

What's in the Baby's Hospital Bag?


Baby's Hospital Bag

Clothes

1. Going home outfit(s)

No, the baby won't need four coming home outfits.  Last week, I narrowed the Bean's outfit down to four options.  This week the temperature hit 100 degrees (after snowing 3 inches less than 2 weeks ago).  Somehow I had forgotten how hot and humid it can be during Nebraska summers, which made me rethink my coming home outfits.  

2. Onesies and sleeper

Since I have no idea what the hospital will dress the baby in, I wanted to have a few cute things for him to look adorable in for his very first photos and visitors.  (One of these also may become the coming home outfit if the day is super hot.)

Clothes in Baby's Hospital Bag

3. Shoes

The shoes will go with the coming home outfit.  I'm hoping for the blue shoes because they are the very first thing that I purchased for the Bean when we found out that it was a boy!

What's in Baby's Hospital Bag?

4. Socks

I didn't find socks on many lists online, but it seemed prudent to have a few pairs...just in case.  Plus, they are cute. 

5. Mittens

If his fingernails are long and sharp, we don't want him scratching himself for two days in the hospital.

6. Cap

Even though it will likely be warm outside, the hospital may be cold.  Since babies are unable to regulate their temperature in the same way we can, I want to ensure that he will be comfortable while we are still at the hospital.


Blankets

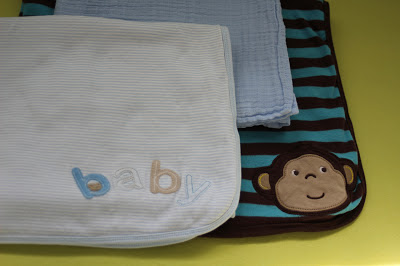
7. Receiving blankets

Two light/medium weight receiving blankets.  Again, I don't know what the hospital will provide, so I want to be prepared.

8. Swaddling blanket

We are also taking a super lightweight muslin swaddling blanket in preparation for hot temperatures!

What's in Baby's Hospital Bag?


Toiletries

9. Pacifiers/soothers

The hospital may provide a couple of pacifiers, but I have two MAM newborn pacifiers from a coupon that I had, so we will take these as well.  

10. Nail clippers (not shown)

For his sharp little fingernails!

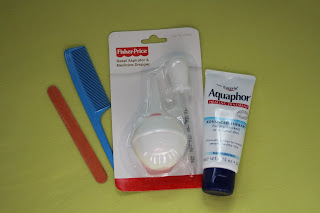
11. Comb

We don't know what type/texture of hair the Bean will have, but I want him to look handsome from the very start, so a little comb will be tucked into the bag.


I still feel like a kid when I see an aspirator (or a snot thingy), and I think, "Gross!", but it is a must-have item.

What's in Baby's Hospital Bag? 

What's in Baby's Hospital Bag?

13. Newborn diapers

From my research, I've found that hospitals usually provide Size 1 diapers instead of newborn sized diapers.  The bigger size will be fine if the Bean is a big baby, but if not, a few newborn diapers will come in handy.

14. Baby wipes

I also found in my research that some hospital do not use baby wipes and instead use wet paper towels.  Yuck!  That does not sound very gentle on my newborn's butt.  So, I'm taking a few baby wipes along with the diapers.


Other

15. Baby memory book for footprints and handprints

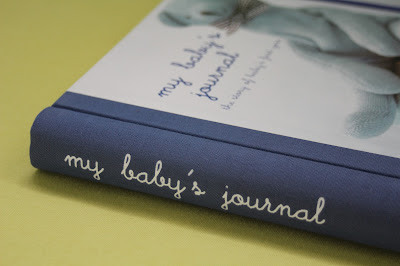
This was the item that was almost forgotten.  When I remembered that I needed to purchase one still, I did some looking online.  There were tons of options online!  But, I wanted to look at every page and browse the book before buying, so I decided not to order online.  Instead, I checked out TJ Maxx, which was recommended to me, Target, and Barnes and Noble.  TJ Maxx was a bust; the store didn't even have a single baby keepsake book.  Target had a couple of options, but they were all jungle themed, which doesn't work for a baby with a farm themed nursery.  Barnes & Noble definitely had the best selection.  I found 3 that I liked ranging from $8 to $35.  

I decided on My Baby Journal, which was $20 in-store (or free with my gift card).

What's in Baby's Hospital Bag?

16. The bag

We can't take any of this stuff without a bag, so I decided to utilize the diaper bag I received from one of my showers.  It is the JJ Cole System Diaper Bag, which I liked because it is cute, but also not so feminine that my husband wouldn't want to carry it.


What's in Baby's Hospital Bag?


17. Carseat

No, the car seat does not fit in the bag, obviously.  But, it is all ready to go!


The printable, downloadable version of the checklist for Baby's Hospital Bag is available here.

Baby's Hospital Bag Checklist

Tuesday, May 21, 2013

Clutter Busting Challenge Week #3


Money Saving Mom is challenging readers to a Clutter Busting Challenge in May.  The challenge is to find 7 things to get rid of each day.  


Though I've struggled, my progress so far is:

Week #1 = 64 items
Week #2 = 64 items


Progress in Week #3

This week was pretty much a waste to be honest!  My travel plans changed and I was out of town for 5 and a half days, so very little progress was made.  I did clean out my car, so I got rid of a bunch of trash and reorganized, so I was happy about the progress there, but I failed at the rest of my plan for last week.  Since I didn't get last week's plan done, I've simply moved it to this week.  I'm crossing my fingers that this week will go better! 

The Plan for Week #4

Days 1-6: Go through 1 basement box per day.
Day 7: Declutter and reorganize DVDs.

Goal for Week #4 = 50 items.  


How was your week?  Did you succeed in finding seven items per day to get rid of for the Clutter Busting Challenge?

Friday, May 17, 2013

{Prepping for the Bean} DIY Crib Makeover

Repainting a Crib

When my husband and I started thinking about planning the nursery for the little Bean, it was not just about coming up with a cute theme.  We also started thinking about whether or not to purchase new furniture, buy used baby furniture off of Craigslist and at garage sales, or to do without.  At the time this winter, both of us were graduate students.  (My hubby has now graduated; yay!)  But, nonetheless in our situation, we felt that it would be irresponsible to spend the money on new furniture for the baby's room.  We don't even have matching furniture in our room; why would an infant need perfectly matching, brand-new furniture?  And honestly, even when we are in a position to spend money like that, I'm not sure that we would.  As you may know from this blog, we are super frugal!

A main item in any nursery is obviously the crib.  It was one item that we definitely could not do without.  Lucky for us, my parents offered us a crib.  The crib is actually my crib from when I was an infant.  Amazingly, seven different babies have slumbered peacefully in this crib over the years.  After I used it, my sister did.  Then my parents loaned it to a family friend who used it for three of her four children, and finally my aunt and uncle's two daughters slept in it as babies.  Our little Bean will be #8 for this crib.  Crazy, right!?

What blessing to have the crib available for us!  However, after seven babies, the stain and finish was wearing off and there were some various scratches and the like.  Not surprising, though.  We immediately decided to refinish it for our Bean's nursery.  

The next decision was how to refinish the crib.  Should we stain or paint the crib?  Initially, we wanted to restain it, but there is some particle board on the sides, which was going to cause some difficulty.  After searching around online for solutions to restaining particle board, we found some possible solutions, but decided against experimenting and hoping for positive results.  Instead, we decided to paint the crib white.  With the white trim in the nursery and green and blue walls, white was the perfect choice.


How to Paint a Crib

Step 1:

Sand down the crib whether it has been stained or already painted.  This creates a better surface for the new paint to adhere to.  My husband used an electric rotary sander for most of the sanding, and sandpaper in the smaller areas.  


After sanding the first section of the crib quite thoroughly, we decided to forego spending the time to sand the rest of the crib as completely.  This was a mistake!  I would recommend making sure that the entirety of your painting surface gets sanded.  The sanded portion was much easier to paint and took fewer coats of paint.

Wipe down with a damp cloth and let dry before painting.

Step 2:

Begin painting!  Since we painted our crib white, we did not need to use a specific primer, but if you are painting a different color, it would probably be a good idea and a money saver.  

An important note to make about the paint.  We used a latex paint from our local Ace Hardware store in an eggshell enamel (something similar to this).  The latex base was recommended by the paint specialist there for infant furniture. We chose to get the eggshell enamel because it should clean up easier when the crib gets spilled upon or colored on.  

The slats were the most difficult part of the crib to paint, so we used a variety of brushes from a angled paint brush to a Foam Paint Brush.  Each type of paintbrush seemed to have its advantages or disadvantages, but I would recommend a mini foam roller.  It seemed to provide the best coverage and fit easily in between the slats.  


DIY Crib Painting

Step 3:

Sand any problem areas where paint may have dripped and created a bubble in the dried paint.  Doing the sanding in between coats of paint will prevent the bubble or problem area from just getting worse with each coat.  

Step 4:

Apply additional coats of paint.  

I believe our crib took about 3 total coats of white paint.  In terms of amount of paint needed, we had to purchase 2 quarts of paint.  However, if you are going to be painting anything else, just go ahead and buy the full gallon to begin with.  

Step 5 (optional):

The next step for us was to add some accents to the crib.  The design of the crib allowed for the addition of a few orange stripes along the side rails and ends.  

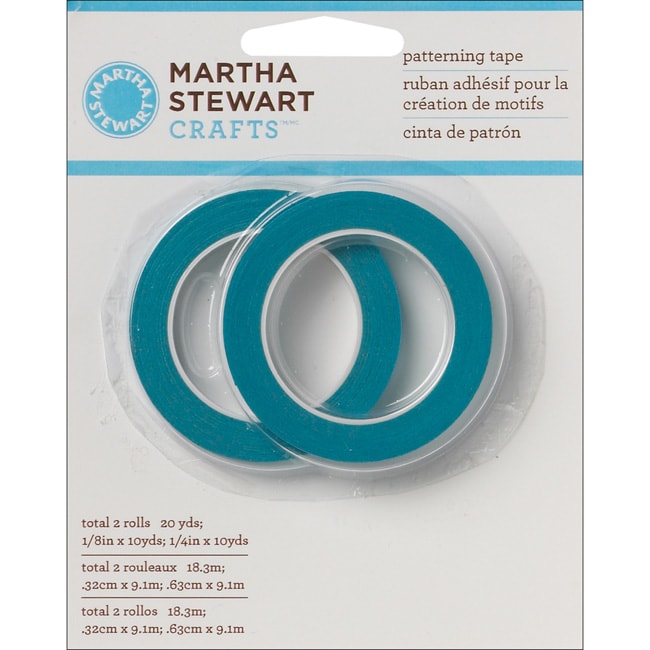
The key to this step is using painter's tape for hobbyists to set up the lines you want.  The painter's tape that you use around trim to paint a room will not work.  Trust me, we tried.  And tried.  The blue or green painter's tape from the home improvement store does not stick enough to create the truly straight lines desired.  

How to Paint Crib Accents

We used both hobby painter's tape from Hobby Lobby and Martha Stewart Patterning Tape from Michael's, and both worked great.  The tape from Hobby Lobby was less expensive, but we needed to purchase some on a Sunday, so we went to Michael's for the second batch instead.  It might also be called artist's tape.

DIY Crib Painting


Step 6: 

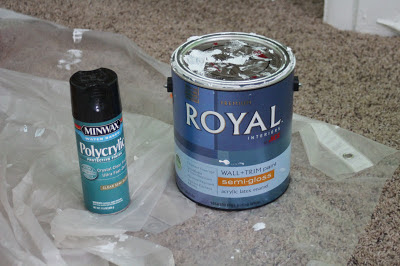
Seal the entire crib.  Sealing the piece of furniture will protect the paint from coming off when your child decides that eating the side of the crib sounds like a good idea, so it also protects your child.  We tried to do a lot of research to figure out the best sealer for baby furniture since much of it could contain carcinogens.  We found a few products online that were soy-based, but were designed for stained woods instead of painted wood.  We also found some polyurethanes at the local home improvement store that were recommended for baby toys and furniture.  However, these also were designed for stained wood, not painted wood.  Why would that matter, you ask?  For us it mattered because the products were slightly tinted, which would ruin the white of our crib.  Finally, we found a water based polyurethane product.  The water base should be safe for baby, and the clear color maintains the correct color of the crib.

DIY Crib Painting

As you can see, we chose the spray version of the water based poly, specifically Minwax Water-Based Polycrylic Semi-Gloss Spray, but there was also a brush on version available.  We only needed one coat of the sealer, and it dried very quickly, so we were able to get the crib assembled the next day.


Here is what our finished crib looked like after our DIY painting adventure.  We learned quite a bit, and are happy to be able to share it here with you!  Hopefully our experience will help you avoid some of the difficulties we ran into while painting our crib.  

DIY Crib Painting


*This post may contain affiliate links.*
tape photo credit