Showing posts with label projects for my home. Show all posts

Friday, May 17, 2019

Hello, Friday!

It's finally Friday, and today ends a busy week here at our house. I'm teaching during the May summer semester, and I love the small class sizes, but do not love the 3 hour long classes every day.  But, today, hubby and I are headed to look for bathtubs for our master bath.  I'll get to that in a minute.

1. "We live in the clearance section."

This is how my sister describes our family!  ðŸ˜‚😂😂  She is not wrong.  I think it's fair to say that we were literally raised to spot a good deal.  And since I enjoy finding a great deal so much, I thought it would make sense to share those deals with friends, family, etc. so I started a deal group on Facebook called Orange Door Deals.  If you know me, you probably understand the name.

Wanna join in the fun?  Click here.

orange door deals group


2. Bathtubs

We have a very large master bath that was built with a giant platform for the drop-in tub.  Which is huge.  The good news is that there are lots of tubs out there.  The bad news is that 1) my husband is 6'4" and 2) we have been spoiled by our huge bathtub.  Now, when we look at bathtubs, we think, "Can we fit all five kiddos in there?"  As you might imagine, that eliminates 99.9% of tubs (that we've seen so far).

We love the freestanding tubs, but they are all really narrow.  The drop-in tubs aren't as trendy, but would allow us to get a larger one.

Decisions, decisions.  Let me know in the comments if you have replaced your master tub...what did you decide?

Harvey Ever After Master Bath Pinterest Board

3. Twins

The twins are crawling!!   I'm not sure how I feel about mobile twins, but they are SO proud of themselves.

Plus, they are both getting their first teeth in!

Why do babies grow so fast???


And that's all I have for today, folks.  Check in on Monday for our weekly menu.  And have a fantastic weekend!


Linking up this week with Becky @ By BMG

Friday, September 8, 2017

Halloween Decorating Tricks For Less

**I was compensated for this post. This post also contains affiliate links and I will be compensated if you make a purchase after clicking on my links.  See my full disclosure for more details.**


Halloween is right around the corner, and it’s time to decorate!


Without ado, here are my top four Halloween decorating tips.


1. Color

The orange and black of the season makes me so happy; ya’ll know I bleed orange, right?  Go Pokes!

Halloween can be so black and white, but I love the pops of purple and orange, especially orange, to take things to another level. 

Halloween Decor Lanterns and Pumpkins
Get your adorable glittery pumpkin here!


2. Consistency

Bats, vampires, ghosts, witches, crows, skeletons, skulls, spiders, jack-lanterns, oh my!  I tend to stick with a limited number of themes around my house.  Personally, I’m not a vampire or ghost fan, but pumpkins are definitely my jam. 

I suggest that you stick with a theme or style around your home for Halloween decorating!

More glittery pumpkins!


3. Not too spooky

Many people love the guts and gore of Halloween, but please leave it at the store for decorating your home.  Halloween décor can classy and fun without grossing everyone out or scaring the children.  I love the cutesy décor that store like Hobby Lobby and Dollar Tree stock in droves. 

Stay classy with your Halloween decorating.  No need for blood and guts, friends.

Halloween Decor

This guy is the closest I've ever come to guts and gore, and honestly, I'm still on the fence about how much I like it.  


4. Height

And finally, my favorite and most importantly, height.  Huh, height?  The biggest challenge I’ve found is that all of my Halloween decorations are fairly close to the same height.  Honestly, it just makes any display look dull and boring. 

Check it out.

Halloween Decor Tricks


And here’s the final dining room display for Halloween!  You can see that varying the height of the pieces makes a huge difference in how attractive the display is.

And a bonus! 

Halloween decorating can get expensive quick (almost as fast as Christmas decorating), but…just say no!  I made this entire display for under $20. 

How?

I started with my own Halloween décor.  The lone witch’s shoe.  Add a trip to Dollar Tree and Goodwill, and we’re done. 

3 wall hangings @ $1/each from Dollar Tree (get your artsy skeleton here)
3 glittery LED-lit pumpkins @ $1/each from Dollar Tree (found here)
2 small lanterns @ $1/each from Dollar Tree 
2 pillar candles @ $1/each from Dollar Tree (found here)
1 witch’s hat @ $1/each from Dollar Tree
1 skull @ $1/each from Dollar Tree (found here)
1 BEWARE yard sign @ $1/each from Dollar Tree (found here)
1 shiney pumpkin @ $1/each from Dollar Tree (found here)
1 creepy cloth @ $1/each from Dollar Tree (found here)
1 candle holder @ $.50/each from Goodwill
3 orange ornaments that look suspiciiouly like pumpkins @ free from my Christmas décor
1 large black lantern @ free from my donate pile

= $15.50! 

My frugal soul loves to see that total!


And my time in Nebraska taught me that I should always have a decoration on my front door, so here we go!  I think these from Dollar Tree are super cute!  

Halloween Pumpkin Wooden Door DecorGlittery Pumpkin Halloween Door Decor Halloween Glittery Door Decor   

I’d love to hear about your decorating tips and “tricks” for Halloween!  Comment below.


Friday, February 5, 2016

Home Decor FAIL!

**This post may contain affiliate links.


Do you remember last Friday's Five on Friday post when I was so motivated and excited to get everything finished in my house?  

And I was thrilled to save $1,400 on an area rug for our living room?

Well one of those things was to finally switch out tablecloths from a Christmas-y one to a neutral one.  (We absolutely have to keep a tablecloth on at all times because kids are hard on furniture, especially an unsealed beautiful wood table.)  

I had considered a couple of different options, but I found a tablecloth on Christmas clearance for 75% off, so I bought it.  

The cool thing about it is that it is a "chalkboard" tablecloth, so the kids or I could draw on it.  

The bad thing about it is that it is vinyl.  I hate vinyl, but it's something I thought maybe I should just accept as a mom of small, messy children.  

I also found these great Yum and Eat placemats at Target last fall and have been waiting to use them!  They are also plastic-y and easy to wipe off.  


Room Essentials® Placemat Polypro YUMRoom Essentials® Placemat Polypro EAT
Cute, right?

No.

The result: FAILURE


My vinyl "trash bag" tablecloth
I see a trash bag.  What do you see?


It's just awful.  

It looks like a trash bag on my table.  No thank you.

I still like the placemats though.  I think.  

Any ideas on what kind/color of tablecloth to use with them?


Saturday, January 30, 2016

How I Saved Over a Thousand Dollars on an Area Rug

*This post may contain affiliate links.


Yesterday, I mentioned in my Five on Friday post that I finally found an area rug at a local overstock store for under $200.  Last night, I decided to try to find my rug online to find out more information about the quality and such.

Honestly, I thought it was a long shot since the store I purchase the rug from specializes in overstocks and closeouts.

So, I Googled . . .

fleur de lis area rug . . . nothing.
fleur de lis black area rug . . . nothing.
fleur de lis black and cream area rug . . . nothing.
fleur de lis heart black and cream area rug . . . YES!

There it was.  A pin on Pinterest with my exact rug.

click.
click.

Yikes!  Wowsers!

Here is what I saw.


The Area Rug I Saved Over a Thousand Dollars On


Sixteen hundred dollars?!?!
$1,600!?!?


So, obviously, I thought it was a fluke.  So I searched more for my rug and there it was on Amazon, Walmart, Wayfair, and more.  All for nearly sixteen hundred dollars!

So how did I do it?  
How did I save nearly $1,400 on an area rug? 

This is how I saved over a thousand dollars on an area rug.

1. Talk to the locals.  We are new to the south and I knew there must be more options that the standard national retail stores and the giant rug store that I had seen tons of billboards for.  My local source is our daycare provider.  She knows all the right places to find things around here.  She was the one that knew about the local overstock/closeout store.

2. Seek closeout and overstock deals.  I have found that closeouts and overstocks are great ways to save money.  Think of the Amazon open-box deals that you can find on diapers sometimes.

3. Dig deep, Be patient.  In this case, my rug was at the bottom of a pile of 50 or 60 rugs.  I could have looked at the top few rugs and eliminated the store altogether.  This rug was truly a treasure hunt and felt like looking for a needle in a haystack.  I could only see about one square foot of the 8x11 foot rug when I selected it.  I was crossing my fingers the entire time as I waited for the employees to get to it that I would actually like the rug.  Luckily, I did.

4. Use store reward programs.  Like many stores, this store had a rewards program.  And there was even a special offer to get an extra 15% off once signed up for the program and filled out the online profile.  I signed up in the store, walked out to my car, sat in my car, and filled out the online profile.  Once I received the email for the extra 15% off, I walked back into the store and bought the rug.

Here's the breakdown.

Original price: $1,573.00
Closeout price: $199.99
Sale + rewards discount: $20.00

Final price = $179.99 

Savings of $1,393.01 or 89%!


I'm loving this rug, and I think I love it more knowing that I saved over a thousand dollars on an area rug!


Friday, January 29, 2016

Five on Friday: Home Edition

*This post may contain affiliate links.  


Wow, it's been a very long time since I jumped into a Five on Friday post.  Even though these are some of my favorite posts, life has just seemed like a sprint since we moved to South Carolina.

1.  IKEA

One of the great things about our new location is that we are only about an hour away from Charlotte.  And that means we are only about an hour away from IKEA.  For years, I have watched as friends posted pictures of their adventures at the iconic store, and I've pinned IKEA hacks over and over from fellow bloggers (especially for children's rooms), but it wasn't until recently that I had the chance to have my very own first IKEA experience.  My husband and I were in Charlotte doing some business research, but I saw IKEA in the distance and convinced him to walk through with me.  Even though we had fun feeling inspired by ideas that we might want to implement someday, at the end of the afternoon, Alexander the Great remarked, "You need to make some friends, so that you can go to IKEA with them."  The unspoken part was along the lines of "...so that you won't drag me here again."  And he's totally right.  The first trip resulted in only one purchase.  Lingonberries.  I've eaten lingonberries at almost every Christmas that I can remember because my Dad makes Aebelskiver every year, our traditional Danish food.

After that first experience, I knew that I would be heading back to Charlotte to bring some IKEA back to our house!  And yesterday was the day!  I am finally finishing off the Littles' room (our 2 year old and our 7 month old).  I have been eyeing the Kallax cube unit forever and finally got it!  Yay!  The picture ledges I wanted to go above the Kallax cube unit were out of stock, but I got a few baskets, and I'm hoping that Hobby Lobby will have some similar shelves.  I decided to spend a bit more and go for the IKEA Kallax instead of the Walmart or Target versions because the cubes are larger by couple inches and I think that will make a big difference for storing kids' toys.

I also found a bath mat that perfect matches the kids' bathroom, a small black picture ledge for my master bedroom, and a frame with knobs on clearance that I'll put in the kitchen to hang towels.

Next time, I want to pick up some of the kitchen wall storage to use in our main bathroom (i.e. the kids' bathroom).  There is really no counterspace, so it's tough to organize the things we use most and don't want to stash beneath the sink.  I'm trying to decide between the spice racks and the Bygel rail with a couple colorful pots and hooks, but I'm leaning toward the Bygel rail.  Thoughts?


2.  Pillow covers

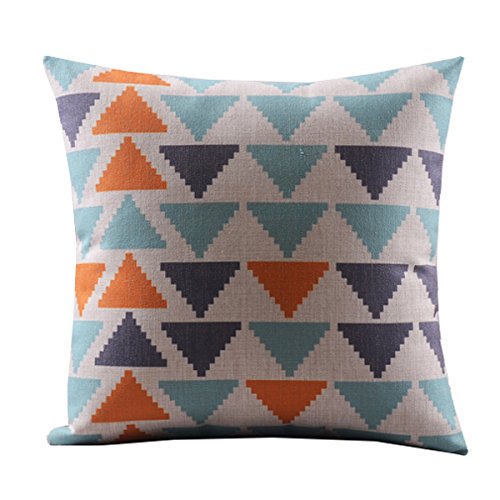
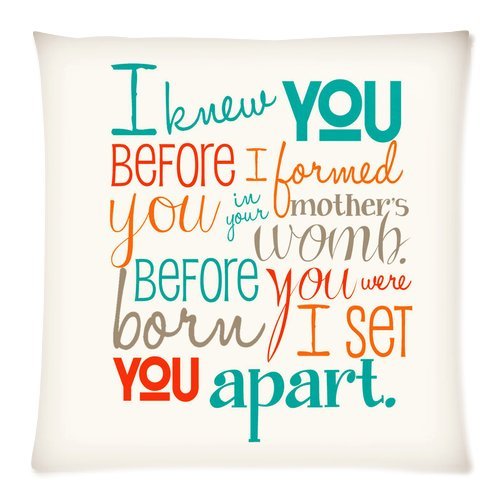
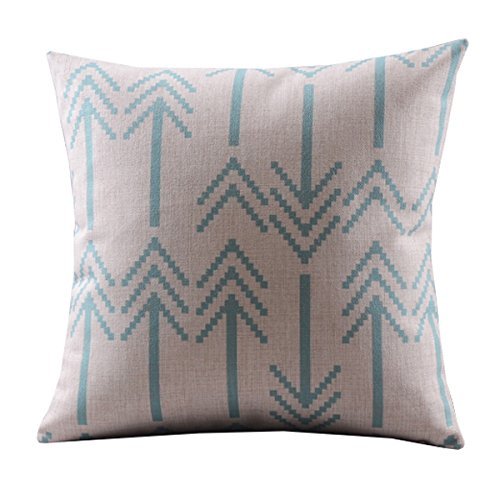
I finally ordered pillow covers for my living room throw pillows that coordinate with the color scheme I'm moving toward.  I need to cover four pillows, and I ran across some pillow cover designs on Pinterest, which led me to Amazon, which led me to some rather inexpensive pillow covers with great ratings.  I'm super excited for them to arrive; the bummer is that it turns out that the pillow covers are being shipping from China.  Oops.  It'll be a month or more before they arrive.
Triangle Pillow Cover from Amazon
Bible Verse Pillow Cover from Amazon
  
Arrow Pillow Cover from Amazon

3.  Rugs

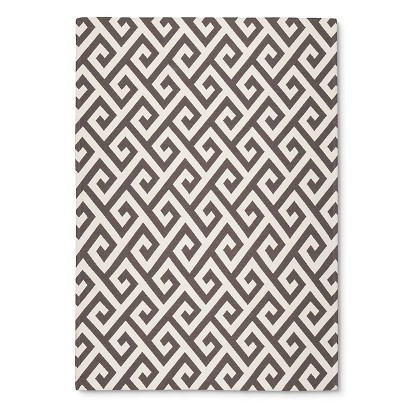
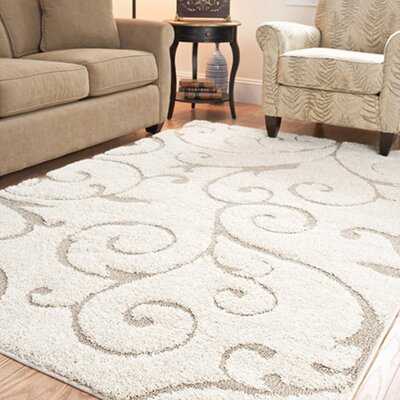
I guess the theme today is home decor and home organization!  Our current rental house has wood or laminate floors except for in the bedrooms.  I know that everyone else in the world loves wood floors, but personally, I hate them.  They are cold and hard.  And high quality rugs are so expensive.  And if you know me, you know that I am a very thrifty, frugal person.  For the past month or so, I have been hunting high and low for a decent rug at a decent price.  Apparently, it is a rather difficult thing to do.  I almost bought this rug from Pier One, but after the shipping costs, no thank you.  I also considered a few from Target.  Because who doesn't love Target?  Anyway, here are some of my favorites.

Grey
Greek Key Rug from Target
Gray
Threshold Fretwork Rug from Target
Swirly Rug from Wayfair

But that was before our daycare nanny told me about a local overstock/closeout place.  One of things I had been struggling with was paying several hundred dollars for a nice tufted rug like I saw at the fancy rug stores or paying $150-$200 for something that was cute, but not high quality.  And at this local store I found the rug.  I joined their rewards program for an extra 15% and went home with an 8'x10' high quality tufted rug for under $200!

You find out how much I saved in my post here.  I was shocked!

Here's my not quite finished living room with the new rug.  Next step, curtains and end table decor.

Zuna Rug - Black - Starkly stylish, the Zuna Rug in Black has a crisp presence on your floor, its unrelenting but curvaceous black and white pattern slightly carved for a tactile and noticeable element of design that makes the perfect backdrop to colorful furniture or achromatic accents. Hand-tufted construction from pure wool of New Zealand origin makes it a pleasure to tread.:
My new rug!

4.  This Mermaid Art

Mermaid Canvas from Zulily
Mermaid Moon Canvas from Zulily

My daughter's theme is mermaids.  (The Little Mermaid was my favorite movie as a child, and I have always wanted to have a mermaid/sea themed nursery.)  I saw these on Zulily and fell in love; I haven't decided whether or not to order one or both, but I think they are just perfect for a little girl's room.

And then there's this . . .

Sleeping Mermaid Print from Zulily

And in another year or so . . .

Mermaid Comforter Set from Zulily
5.  Lists

I love lists.  Love them.  Right now I have about 7 of them for different categories of things I need to do.  Over the weekend, I plan to cross off a lot of items from the category of finishing our house.  It's time.


Have a fantastic weekend all!


Wednesday, August 20, 2014

8 Unique Chore Charts & Chore Systems


Baby Prez isn't old enough for chores yet, but at 11 years old, Miss Coco is!  Of course, I turned to Pinterest to find some inspiration on organizing and setting up a system.  Here are my favorite options so far.


Chore Jar from Whatever Dee Dee Wants


This seems like a really simple and fun way to organize chores, especially for multiple children.


Mom, Too Chart from Alaboard


This chevron inspired system is for sale at Alaboard.com for $20, but honestly I just like this as an example that chore charts can include Mom (and Dad).


Button System from She's Crafty


This system incorporates monthly allowance, tithing, bonus opportunities, and competition!  I've also seen a version of this from the Winthrop Chronicles with buttons and mason jars.


Chore Cards from Madsen's Memories


These chore cards are great!  No miscommunication about what needs to be done!  Now I just need a laminator and cardstock!


Daily Job Zones from The Creative Homemaker


What a perfect way to make sure all of the tasks in each room are completed.


Free Printable Chore Chart from The Gilded Pear


My favorite thing about this chart is that it incorporates a penalty for bad behavior.


DIY Magnetic Chore Charts from A Spotted Pony


I love the Magnetic Chore Charts from Abbie's House.  They are cute, but I'm not in the market to buy a system.  Love the magnets, though!  So easy for kids to move the magnets from To Do to Done.  

And you could easily do a DIY version with inexpensive cookie sheets and chalkboard paint from the dollar store like in the photo above!


Coloring Book Chore Chart from And We Play


And I honestly can't wait to start using this adorable coloring book chart with my little one!  Seriously, what could be cuter?


Check out more chore charts and other kiddo organization ideas on Pinterest!


Coming soon...a giant list of free printable chore charts!  If you have one on your blog, please submit it in the comments below!  I'd love to include as many as possible!


*This post may include affiliate links.

Tuesday, November 12, 2013

{10 weekly goals} 11/11-11/18


This Week’s 10 Goals
1.
Catch up on HarveyEverAfter baby updates
2.
Put together blogging schedule/plan
3.
Menu plan & grocery shop for the next week
4.
Plan Christmas gifts
5.
Finish Baby President’s new room
6.
Combat dog shedding by vacuuming at least every other day
7.
Try out speed cleaning for the next month
8.
Finish survey for 2nd year paper
9
Write a conference paper by November 18th
10.
Grade exams

Monday, July 22, 2013

{Project Reveal} Displaying Travel Souvenirs

Ever wonder what to do with those brochures, maps, and other travel souvenirs?

I always come home with all kinds of paper souvenirs from my vacations like brochures, maps, receipts, ticket stubs, etc.  When I was younger and did a lot of scrapbooking, my scrapbook was an obvious place to keep them, but as I've stopped scrapbooking as much, I have simply ended up with much paper clutter from my travels.

Last summer, I surprised my boyfriend (now husband) with a trip to Seattle.  When we returned, I again had all kinds of paper souvenirs that ended up in a pile of paper clutter.  And paper clutter is one of my personal pet peeves and nemeses.  One of my constant goals is to figure out how to reduce my paper clutter.

I decided to combine some photos from the trip with one of the maps of downtown Seattle that we used during the trip and recycle the remainder of the brochures and such.

Walgreens is my favorite photo site because there I can create my photo order and pick it up an hour later.  And there is always a store location nearby!  For this project, I created created photo collages.  I thought about scanning some of the brochure sections to include, but decided to stick with photos for this project.

Instead of only photos, I used a 4x6 inch section of the map in a frame that I already owned and re-purposed for this project.


Supplies
2 4x6 photo collages
1 map of downtown Seattle
1 3 photo frame

Instructions

1. Choose a collage style photo frame.
2. Decide which souvenirs you want to display and cut them down to the size of the frame openings.
3. Choose, print, and insert travel photos for the rest of the frame openings.


Project Reveal

DIY travel souvenir display project


I love the way this project turned out.  I was able to display my travel souvenirs and some photos of our travels for only the cost of the of the photos which was less than $1!


Friday, May 10, 2013

{Prepping for the Bean} Nursery Makeover Update

When my hubby and I found out that a Bean was headed our way in June, we decided to convert the upstairs TV room to a nursery for the little guy.  (What two person household needs two rooms for watching TV anyways?)

As I've mentioned in past posts, we moved all the furniture that was in there into the master bedroom in order to get the nursery ready.  I've sold some of the furniture and some will eventually be moved back into the room or to the basement.  

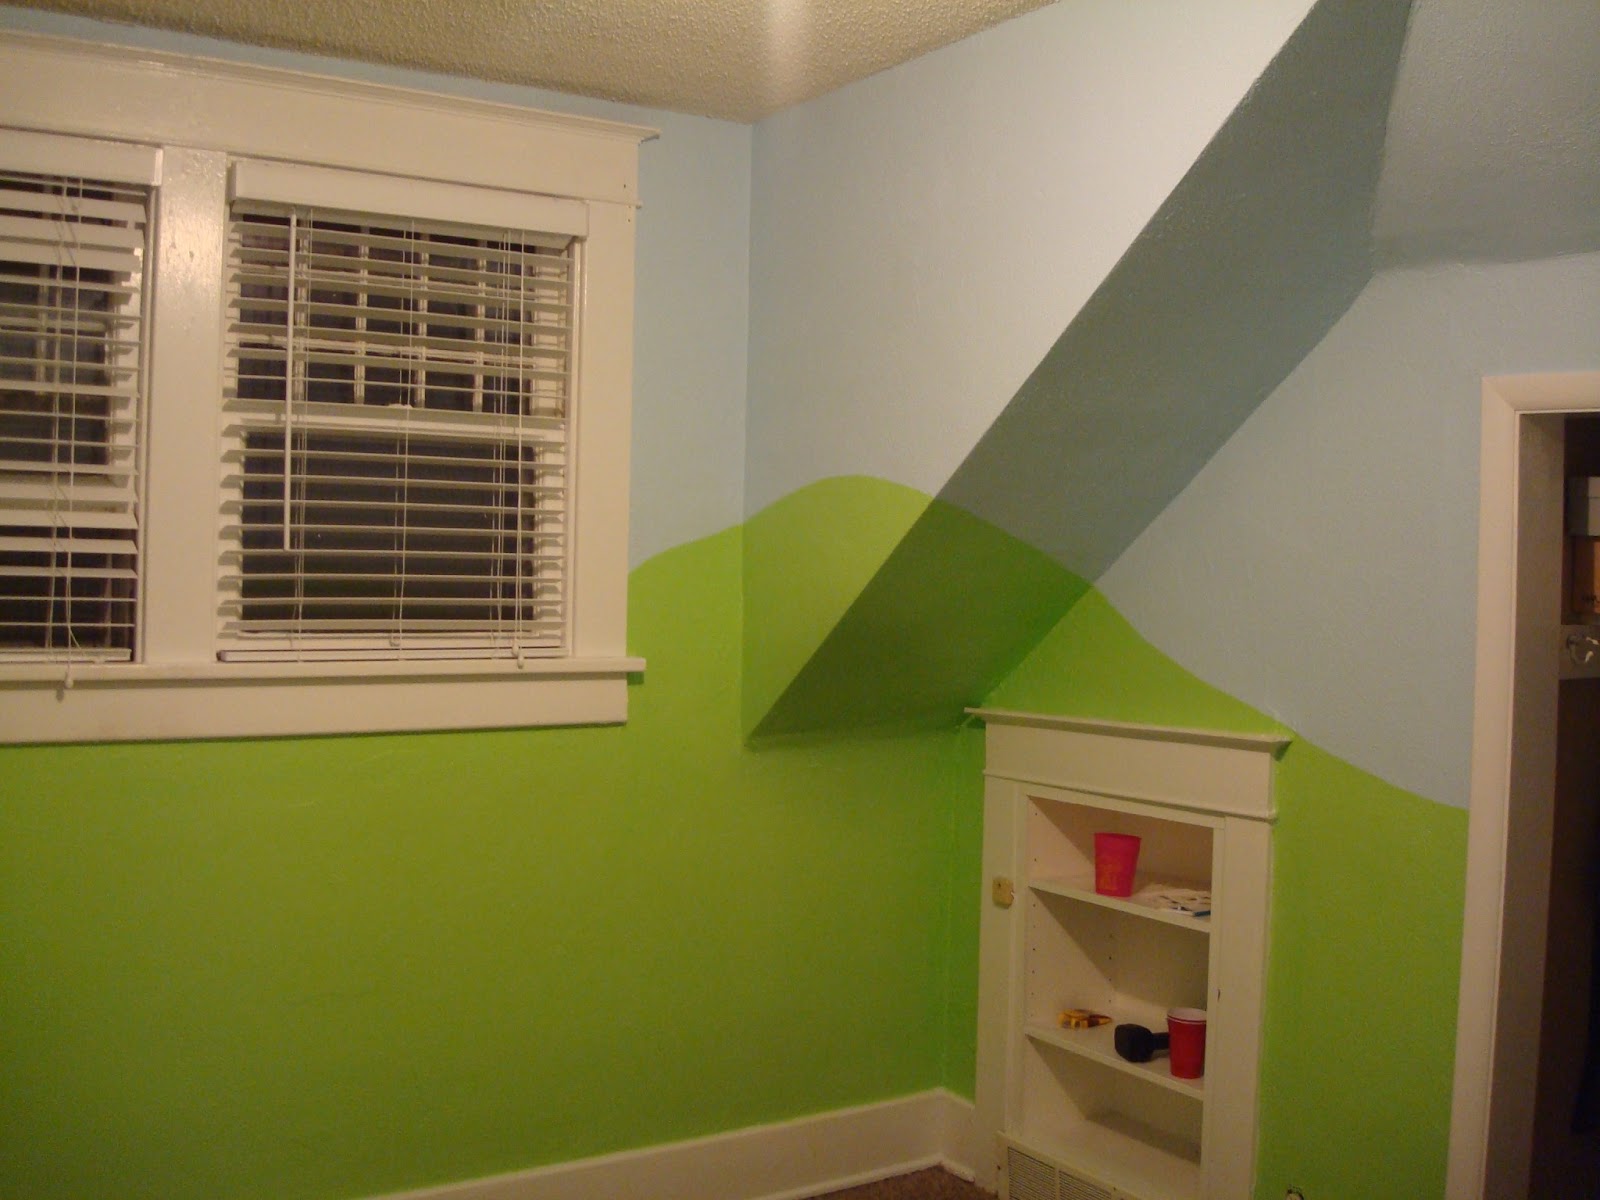
We were blessed to have the grandmas visit to help paint the room.  With the farm animal theme we decided on, the room's original dark beige would have worked, but my husband had a vision of blue skies and green hilly pastures for the room.  I said, "Go for it, babe!"  And I can now say that he is a visionary.  It looks amazing.  

Painting the Nursery

Nursery Makeover

Nursery Makeover

Farm Themed Nursery Makeover

Farm Themed Nursery Makeover

That was back in March, so fast forward a few months, and we started working on the rest of the nursery.  My husband painted the crib with with orange accents.  White would have worked, but he had another vision of accents.  And, again, it looks awesome!

Farm Themed Nursery Makeover

Nursery Makeover

Nursery Makeover

After a long process to achieve perfect accents, we put the crib together!  Yay!  The Bean is so close to having a place to sleep!

Nursery Makeover
Gotta love a man with power tools!
DIY Painted Crib
Pretty crib skirt made by my MIH.
We also deep cleaned and shampooed the nursery carpets, so as soon as the carpet is fully dry, the rest of the furniture will be moved into the room and arranged.  

Then the organizing can begin!   I can't wait to see how our farm-themed nursery turns out!