Showing posts with label photos. Show all posts

Thursday, November 7, 2013

{Wish List} Santa Hat & Cape for Baby

This is just too adorable not too share!  If I thought that my 5-month old would lay still enough to take photos with the cape, I would totally be buying this set immediately!


Even though I'm not buying it, you could buy it for your little one this Christmas!  You can get it at: 


*This post may contain affiliate links.*

Monday, July 22, 2013

{Project Reveal} Displaying Travel Souvenirs

Ever wonder what to do with those brochures, maps, and other travel souvenirs?

I always come home with all kinds of paper souvenirs from my vacations like brochures, maps, receipts, ticket stubs, etc.  When I was younger and did a lot of scrapbooking, my scrapbook was an obvious place to keep them, but as I've stopped scrapbooking as much, I have simply ended up with much paper clutter from my travels.

Last summer, I surprised my boyfriend (now husband) with a trip to Seattle.  When we returned, I again had all kinds of paper souvenirs that ended up in a pile of paper clutter.  And paper clutter is one of my personal pet peeves and nemeses.  One of my constant goals is to figure out how to reduce my paper clutter.

I decided to combine some photos from the trip with one of the maps of downtown Seattle that we used during the trip and recycle the remainder of the brochures and such.

Walgreens is my favorite photo site because there I can create my photo order and pick it up an hour later.  And there is always a store location nearby!  For this project, I created created photo collages.  I thought about scanning some of the brochure sections to include, but decided to stick with photos for this project.

Instead of only photos, I used a 4x6 inch section of the map in a frame that I already owned and re-purposed for this project.


Supplies
2 4x6 photo collages
1 map of downtown Seattle
1 3 photo frame

Instructions

1. Choose a collage style photo frame.
2. Decide which souvenirs you want to display and cut them down to the size of the frame openings.
3. Choose, print, and insert travel photos for the rest of the frame openings.


Project Reveal

DIY travel souvenir display project


I love the way this project turned out.  I was able to display my travel souvenirs and some photos of our travels for only the cost of the of the photos which was less than $1!


Saturday, May 25, 2013

Graduation Celebration

Happy Graduation, Sister!

Last weekend, I had the privilege to travel (yes, even at 36 weeks prego) to Kansas to see my little sister graduate from college!  She is following in the family footsteps and heading to graduate school next fall at Oklahoma State!  Woot, woot!  Go Pokes!

Here are a few photos from our graduation photo shoot and family weekend.  

Congratulations, Sister!

Graduation Celebration

Graduation Celebration

Graduation Celebration

Graduation Celebration

Graduation Celebration

Graduation Celebration

Graduation Celebration

Graduation Celebration


Congratulations!

Saturday, May 11, 2013

My Meadow

Here in Nebraska, we have had some crazy weather lately.

Just 9 days ago, it was SNOWING!  Then came the rain, and now we are finally getting a few sunny days.  I'm hoping and praying that we don't skip spring and go straight to the hot, humid summer that is typical here.

With the spring rains also comes lawn mowing season.  The grass and weeds have sprouted right up, and my husband mowed the front yard for the first time this year today.

The back yard is a different story.

Our rental house sits on about an acre of land, which means that we have a huge, gigantic yard in the back.  In the past few days, the dandelions and henbit flowers are blooming in abundance.  As I was standing on our balcony looking out over the yard this morning, I was thinking about how we decide if a plant is a weed or not.  Dandelions and henbit are considered weeds, yet as I stood there, I was astonished by the beauty of it all.  Even though the plants are thought to be a nuisance by most, I must admit that I like them, especially in my back yard.

My back yard looks like what I imagine a meadow full of wild flowers looks like.  Just pretty and the definition of spring!

I brought out my brand spanking new camera to try it out.  Tomorrow I'll be going out to take some additional shots (and I'll probably force my puppies to be my photo subjects, which they are not always fans of).

Backyard Meadow


My attempt to capture the beauty and radiance of the spring morning and my own personal meadow was only partially successful.  Somehow it seems impossible to truly capture a moment in a photo.  I wish you could add a scent or a slight breeze to a photograph instead of only capturing an image.


Spring


My favorite parts about the yard are the swing (as shown in the photo above) and the sheer size of it.  I love swinging while watching my husband run around and play with our three puppies.  They are actually dogs to be truthful, but they will always be like puppies to me.  The two mini Australian Shepherds like to run, run, run.  Our toy poodle is obsessed with tennis balls.  Not only does she like to chase them when thrown, but she when chases the ball down, she does not like to give it up!!  She will trot all around the yard with a regular-sized tennis ball in her teeny little mouth.  

When the Bean arrives this summer, I'm excited to take him out on walks, even just around our yard.  By next summer or even later this fall, the Bean will be big enough to swing himself, so I will have to find a baby swing to hang on the tree branch or otherwise install in the yard.  (He's already excited about it, too.  I can tell because he is kicking pretty hard as I write this.)


Just musings about life and my beautiful, growing family.  

Friday, May 10, 2013

{Prepping for the Bean} Nursery Makeover Update

When my hubby and I found out that a Bean was headed our way in June, we decided to convert the upstairs TV room to a nursery for the little guy.  (What two person household needs two rooms for watching TV anyways?)

As I've mentioned in past posts, we moved all the furniture that was in there into the master bedroom in order to get the nursery ready.  I've sold some of the furniture and some will eventually be moved back into the room or to the basement.  

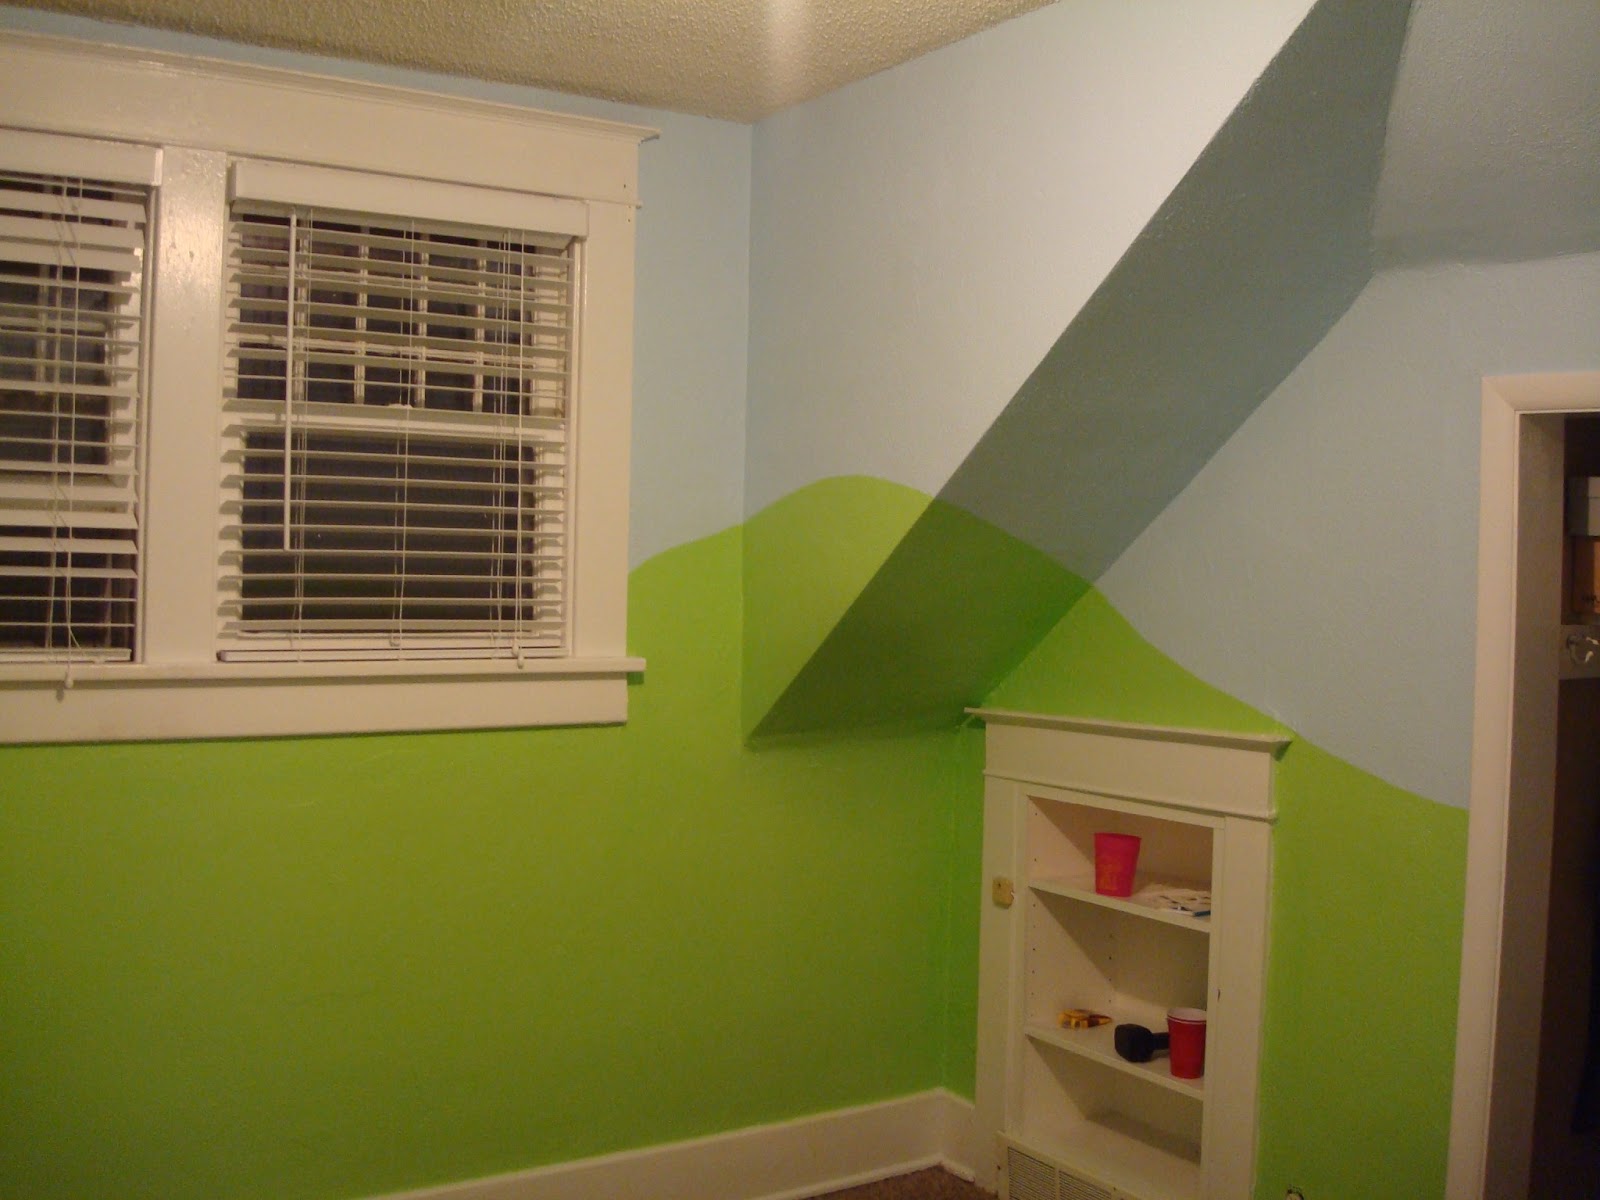
We were blessed to have the grandmas visit to help paint the room.  With the farm animal theme we decided on, the room's original dark beige would have worked, but my husband had a vision of blue skies and green hilly pastures for the room.  I said, "Go for it, babe!"  And I can now say that he is a visionary.  It looks amazing.  

Painting the Nursery

Nursery Makeover

Nursery Makeover

Farm Themed Nursery Makeover

Farm Themed Nursery Makeover

That was back in March, so fast forward a few months, and we started working on the rest of the nursery.  My husband painted the crib with with orange accents.  White would have worked, but he had another vision of accents.  And, again, it looks awesome!

Farm Themed Nursery Makeover

Nursery Makeover

Nursery Makeover

After a long process to achieve perfect accents, we put the crib together!  Yay!  The Bean is so close to having a place to sleep!

Nursery Makeover
Gotta love a man with power tools!
DIY Painted Crib
Pretty crib skirt made by my MIH.
We also deep cleaned and shampooed the nursery carpets, so as soon as the carpet is fully dry, the rest of the furniture will be moved into the room and arranged.  

Then the organizing can begin!   I can't wait to see how our farm-themed nursery turns out!

Monday, May 30, 2011

Summer

It's officially summer because school is out and the big news is that I have a roommate.  My sister Kiley is living here for the summer!  She has a job as a counselor for a kids' camp, which sounds like a blast.

I also recently had some visitors to my house.  My maternal grandparents and my parents came up for a weekend to help Kiley move in and for my grandparents to see my home.  We had a lot of fun and I enjoyed showing them around Lincoln and taking them to my favorite local restaurants. 

Last week I saw Wicked in Omaha with one of my best friends here and my sister.  It was fantastic!  Even better than I remembered and what a great day with friends.  After the show, we walked down to the Old Market area and found a restaurant for an early dinner.  Stokes was wonderful; we got to sit outside on the patio, take advantage of happy hour specials (like a raspberry mojito and ahi tuna tacos), and had great service.  We finished off the day with ice cream from Maggie Moo's and I have to say that the chocolate peanut butter was delicious. 


For Memorial Day weekend, we headed back home for a wedding reception and to celebrate my mom's birthday.  The reception was so much fun; it's always entertaining to go to a traditional hometown reception.  We also hit up the usual places like Taco Shop (yum!!!).  Kiley and I made a German chocolate cake from scratch for our mom's birthday from Trisha Yearwood's recipe.  It was amazing, but I would recommend making a little extra frosting.  

Trisha Yearwood's German Chocolate Cake
 
4 ounces sweet dark chocolate
1 cup (2 sticks) butter, at room temperature
1/4 cup warm milk
2 1/2 cups sifted cake flour
1 teaspoon baking soda
1/2 teaspoon salt
5 medium egg whites
2 cups sugar
5 medium egg yolks, at room temperature
1 teaspoon vanilla extract
3/4 cup buttermilk, well shaken
 

For the coconut frosting:
1 cup sugar
4 medium egg yolks
1 cup evaporated milk
1/2 cup (1 stick) butter
1 teaspoon vanilla extract
10 ounces fresh or frozen and thawed grated coconut
1 1/2 cups finely ground pecans, walnuts, or almonds
1/4 cup warm milk

  1. Prepare the chocolate by melting it in the top of a double boiler, stirring until it is smooth. Add 1/4 cup (1/2 stick) of the butter and stir until it is melted and blended. Add 1/4 cup of warm milk and stir until smooth. Set the chocolate aside to cool.
  2. Preheat the oven to 350ºF.
  3. Line the bottoms only of three 9-inch cake pans with circles of parchment paper, or grease each pan bottom only with solid shortening and dust lightly with flour. 
  4. Sift together the sifted and measured flour, baking soda, and salt.
  5. Whip the egg whites until stiff using the wire beater of the mixer. Transfer the beaten whites to a separate bowl and set aside.
  6. In the mixer bowl, cream the remaining 1 1/2 sticks of butter and sugar together until fluffy. Add the egg yolks one at a time, beating well after each addition. Add the melted, cooled chocolate and the vanilla. Mix well.
  7. With the mixer on very low, stir in the flour mixture alternately with the buttermilk. Do this by adding about a third of the flour and slowly stirring it in completely. Then add about half the buttermilk and stir it in. Continue adding flour and buttermilk in this manner, ending with flour. Scrape the sides and bottom of the bowl and stir again. With a long-handled spoon or spatula, fold and stir the beaten egg whites into the batter until the batter is smooth with no visible clumps of whites.
  8. Divide the batter evenly between the prepared pans and bake for 30-40 minutes. Bake on the middle rack of the oven, allowing at least 1/4-inch clearance between the pans and the oven walls. The cake will rise above the pan edges as it bakes but will not spill over and will settle back down as it continues to bake. The cake is done when it begins to pull away from the sides of the pans and springs back to a light touch. Cool layers in the pans for about 8 minutes.
  9. Run a knife around the edges of each pan and turn the layers out onto wire racks that have been sprayed with cooking spray. Cool layers completely before frosting.
  10. To make the frosting, combine the sugar, egg yolks, and evaporated milk in the top of a double boiler. Stir with a wire whisk until the yolks are fully incorporated. Add the butter. Place over simmering water and bring to a boil (see Note below). Simmer for 12-15 minutes longer, stirring constantly, until the mixture thickens. Add the vanilla, coconut, and nuts. Cool.
  11. To assemble the cake, place one layer on a cake stand and spread with frosting. Frost each layer completely, top and sides, as it is added to the cake.
Note: You can also make the frosting in a regular saucepan, but be sure to stir it constantly, as it scorches quite easily. Also, you must use the finely grated fresh or frozen coconut, not canned or shredded, to be able to spread the frosting on the sides of the cake easily.


AND Kiley made incredible chicken enchiladas tonight!  Unfortunately, I didn't think of taking pictures until after we'd eaten, but they were great and super easy!

Sam's Mom's Chicken Enchiladas

3-4 chicken breasts, shredded
1 tub fiesta dip or jalapeno sour cream dip
1 tub sour cream
tortillas
shredded cheese
Louisiana hot sauce
  1. Preheat the oven to 350 degrees.
  2. Mix the fiesta dip and sour cream in a bowl.  Now you are ready to assemble!
  3. Spread a layer the sour cream mixture on a tortilla.  Now add chicken, hot sauce (to taste), and shredded cheese down the middle.  There are no specific quantities for each, we just make it look good. :)  Wrap the tortilla and put it in a 9x13 glass pan.  
  4. Repeat until the pan is full.  Put the remaining sour cream mixture on top and add a layer of shredded cheese.  
  5. Bake covered for 30 minutes; then remove the foil and back uncovered for 10 minutes.  Yum!

Monday, February 28, 2011

Monday, August 2, 2010

Home in Progress

My parents and I went to Lincoln this past weekend to move the rest of my belongings into my new house.  Finally out of the storage unit!  After about 2 and a half days, we made a lot of progress!  My dad was Mr. Handyman; he hung curtains, fixed some leaks in the shower, painted the inside of the medicine/linen cabinet, caulked the bathtub, etc.  My mom and I spent a very long time recovering the kitchen and bathroom shelves with contact paper because some previous tenants wrapped contact paper around about 2 inches on the bottom of the shelves, which looked tacky and was pretty icky.  They look amazing and fresh now! 

Then we worked on getting the kitchen organized.  I have quite a bit of kitchen "stuff" and there is not much cabinet space, so it was a challenge to figure out where to put everything.  Thankfully, the laundry room has an extra cabinet that I am going to use as a pantry.  One of our challenges was where to put the silverware tray.  The only drawer big enough for the tray is in the rolling island cart, but it still isn't big enough to expand the tray to fit all of my silverware.  So, I finally decided to set the tray on top of the microwave.  That's my best solution at the moment, but maybe I'll be able to figure something more effective out!  I have a lot of unpacking clothes and decorations when I go back in a few weeks, but I'm we made SO much progress that it's not looking as daunting as when we first arrived on Friday!  

Now, here are a few pictures of my home in progress!


And Darby!!!!


Tuesday, July 20, 2010

Paint...check!

Last weekend, my parents and I painted my duplex!  It looks like a completely different place!  When I looked at the duplex before renting it, the people that lived there then were in the process of packing to move, so there was a lot of stuff all over, so it was difficult to gauge the size of the rooms.  The living room was the biggest surprise - it was a lot larger than I remembered.  We painted everything except for the laundry room, which stayed purple, and the garage.  As usual with a rental, we found that several things were not in great repair.  The vents were ridiculously dirty with dog hair...ick!  We tried cleaning them with the vacuum and soap and water.  Neither worked very well, but we eventually got them reasonable clean and spray painted them a tan that better blends in with the carpet and tile.  The contact paper that is on the kitchen and bathroom shelves is gross, so we plan to take that out in a few weeks when we move the rest of my furniture and boxes.  I bought new pretty green and white for the kitchen and blue and brown polka dots for the bathroom from Target!  Possibly the worst part is the garage floor, which is filthy with oil and dirt that gets tracked into the house; hopefully I will get permission from my landlord to paint it with that sealing paint stuff.  The positives though are that there is quite a bit more storage than I remembered, and the carpet is a lot nicer than I remembered!  The paint looks awesome and I'm so glad that my landlords okayed it!  We cleaned and painted for 5 hours on Friday and 10 hours on Saturday; we were definitely exhausted after that!  Now I'm looking for a used trundle bed for my spare room because the bedrooms are a lot smaller than my last place!  Here are a few before and after photos!

Living Room (before)


Living Room (after)
 

Bathroom (before & after)

Kitchen (after)

Bedroom (after)

Living room with my new furniture!

Tuesday, July 13, 2010

Teaching...oh my!


Just about a month until I will be in Lincoln full time, so I decided to crack open my books today!  No, not my books for the classes I'm taking, but the books for the class that I'm teaching discussion sections for.  The teaching manual is much less exciting than the student's textbook...no pictures, charts, or anything.  I took this class at OSU my freshman years, I guess it's time to start studying! 

Furniture comes tomorrow, so I will at last be able to finalize paint colors!  This morning I had to search through my storage unit for my living room curtains because I'm thinking about an accent wall in the living room and I want to make sure the paint doesn't clash with the drapes.  The only other thing to consider is the carpet color, but I will hopefully narrow the choices down before we get there to see the carpet.  I'm still leaning towards "Trenchcoat Khaki", which I used my senior year in Stillwater.  It's not a current color, but I confirmed with Walmart today that they can still make it!

Almost time to start dinner!  I'm using a recipe from my friend Sarah's blog for enchiladas!  I can't wait to see how they turn out!

Monday, July 12, 2010

Friendly Flowers

I have three pots of flowers for my new home, and I can't wait until they start growing and blooming!  They are going to look beautiful on my front porch! 


I also just ordered new living room furniture!  I found a super comfortable set in Claflin that are discontinued, so I got an incredible deal on a matching mocha chaise and loveseat. 

Things are coming along quite nicely for my little duplex.  Now on to picking paint colors...I've gone to Ace, but today I'm going to Walmart, Heartland, and Home Depot!  Suggestions are welcome!