When my husband and I started thinking about planning the nursery for the little Bean, it was not just about coming up with a cute theme. We also started thinking about whether or not to purchase new furniture, buy used baby furniture off of Craigslist and at garage sales, or to do without. At the time this winter, both of us were graduate students. (My hubby has now graduated; yay!) But, nonetheless in our situation, we felt that it would be irresponsible to spend the money on new furniture for the baby's room. We don't even have matching furniture in our room; why would an infant need perfectly matching, brand-new furniture? And honestly, even when we are in a position to spend money like that, I'm not sure that we would. As you may know from this blog, we are super frugal!
A main item in any nursery is obviously the crib. It was one item that we definitely could not do without. Lucky for us, my parents offered us a crib. The crib is actually my crib from when I was an infant. Amazingly, seven different babies have slumbered peacefully in this crib over the years. After I used it, my sister did. Then my parents loaned it to a family friend who used it for three of her four children, and finally my aunt and uncle's two daughters slept in it as babies. Our little Bean will be #8 for this crib. Crazy, right!?
What blessing to have the crib available for us! However, after seven babies, the stain and finish was wearing off and there were some various scratches and the like. Not surprising, though. We immediately decided to refinish it for our Bean's nursery.
The next decision was how to refinish the crib. Should we stain or paint the crib? Initially, we wanted to restain it, but there is some particle board on the sides, which was going to cause some difficulty. After searching around online for solutions to restaining particle board, we found some possible solutions, but decided against experimenting and hoping for positive results. Instead, we decided to paint the crib white. With the white trim in the nursery and green and blue walls, white was the perfect choice.
How to Paint a Crib
Step 1:
Sand down the crib whether it has been stained or already painted. This creates a better surface for the new paint to adhere to. My husband used an electric rotary sander for most of the sanding, and sandpaper in the smaller areas.
After sanding the first section of the crib quite thoroughly, we decided to forego spending the time to sand the rest of the crib as completely. This was a mistake! I would recommend making sure that the entirety of your painting surface gets sanded. The sanded portion was much easier to paint and took fewer coats of paint.
Wipe down with a damp cloth and let dry before painting.
Step 2:
Begin painting! Since we painted our crib white, we did not need to use a specific primer, but if you are painting a different color, it would probably be a good idea and a money saver.
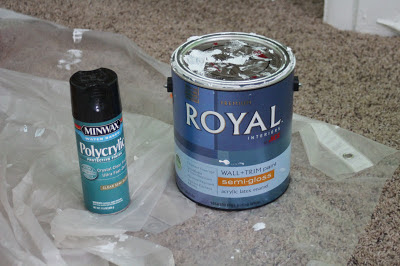
An important note to make about the paint. We used a latex paint from our local Ace Hardware store in an eggshell enamel (something similar to this). The latex base was recommended by the paint specialist there for infant furniture. We chose to get the eggshell enamel because it should clean up easier when the crib gets spilled upon or colored on.
The slats were the most difficult part of the crib to paint, so we used a variety of brushes from a angled paint brush to a Foam Paint Brush
 . Each type of paintbrush seemed to have its advantages or disadvantages, but I would recommend a mini foam roller
 . It seemed to provide the best coverage and fit easily in between the slats.
Step 3:
Sand any problem areas where paint may have dripped and created a bubble in the dried paint. Doing the sanding in between coats of paint will prevent the bubble or problem area from just getting worse with each coat.
Step 4:
Apply additional coats of paint.
I believe our crib took about 3 total coats of white paint. In terms of amount of paint needed, we had to purchase 2 quarts of paint. However, if you are going to be painting anything else, just go ahead and buy the full gallon to begin with.
Step 5 (optional):
The next step for us was to add some accents to the crib. The design of the crib allowed for the addition of a few orange stripes along the side rails and ends.
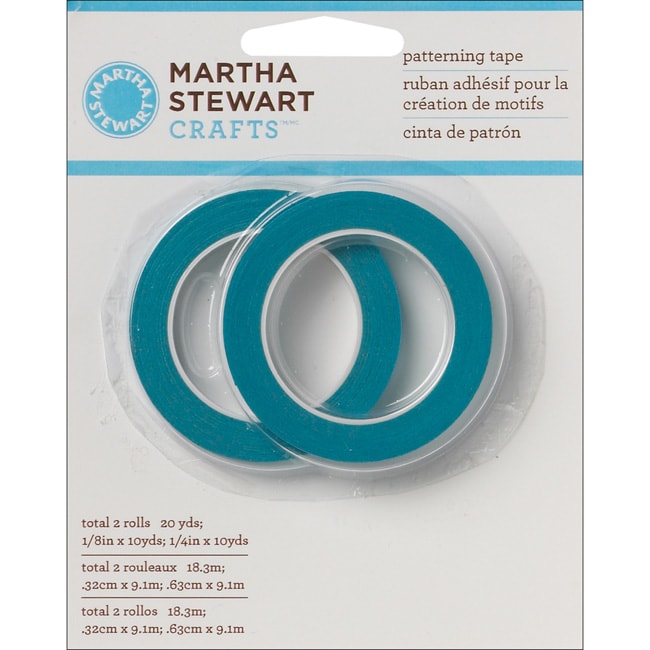
The key to this step is using painter's tape for hobbyists to set up the lines you want. The painter's tape that you use around trim to paint a room will not work. Trust me, we tried. And tried. The blue or green painter's tape from the home improvement store does not stick enough to create the truly straight lines desired.
We used both hobby painter's tape from Hobby Lobby and Martha Stewart Patterning Tape from Michael's, and both worked great. The tape from Hobby Lobby was less expensive, but we needed to purchase some on a Sunday, so we went to Michael's for the second batch instead. It might also be called artist's tape.
Step 6:
Seal the entire crib. Sealing the piece of furniture will protect the paint from coming off when your child decides that eating the side of the crib sounds like a good idea, so it also protects your child. We tried to do a lot of research to figure out the best sealer for baby furniture since much of it could contain carcinogens. We found a few products online that were soy-based, but were designed for stained woods instead of painted wood. We also found some polyurethanes at the local home improvement store that were recommended for baby toys and furniture. However, these also were designed for stained wood, not painted wood. Why would that matter, you ask? For us it mattered because the products were slightly tinted, which would ruin the white of our crib. Finally, we found a water based polyurethane product. The water base should be safe for baby, and the clear color maintains the correct color of the crib.
As you can see, we chose the spray version of the water based poly, specifically Minwax Water-Based Polycrylic Semi-Gloss Spray , but there was also a brush on version available. We only needed one coat of the sealer, and it dried very quickly, so we were able to get the crib assembled the next day.
Here is what our finished crib looked like after our DIY painting adventure. We learned quite a bit, and are happy to be able to share it here with you! Hopefully our experience will help you avoid some of the difficulties we ran into while painting our crib.


No comments:
Post a Comment